Episode 11.3
- Top Page
- Nameless Island
- Sphinx Changes
- New Weapons
- New Armor
- New Cards
- New Quests
- New Emotions
- Monster Drop Changes
- Mercenary System
- War of Emperium: SE
Page Hits: 2383
| New Quests | ||||||||||||||||||||||||||||||||||||||||||||||||||||||||||||||||||||||||||
 |
Table of Contents
Nameless Island
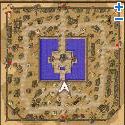
1. Below deck on the international airship which flies between Izlude, Rachel and Juno, you'll be confronted by "Agent". He will ask you to meet Father Bamph in Prontera. Note that this NPC will not appear unless you've completed the Curse of Gaebolg quest. 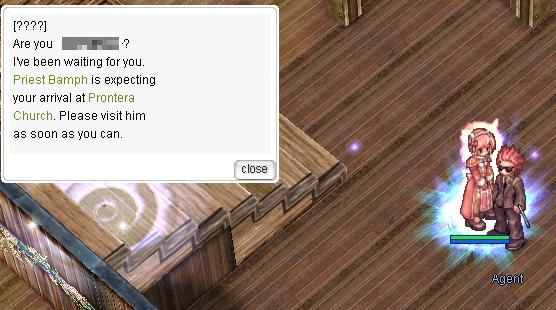 2. Meet with Father Bamph in Prontera. He will ask you to meet with a contact in the Comodo Casino by the name of Larjes concerning a missing Midgard official.  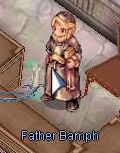 3. On floor 1 of the comodo casino you'll see an Ordinary Man. After talking to him he will pull you aside to talk. Talk to him once more, and he'll ask you to return to Father Bamph.  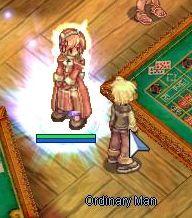 4. Return to Father Bamph. Keep talking to him until he makes up his mind about what to do. He will send you to Rachel to investigate. 5. In the Rachel inn, talk to the Waiter and get a seat. You will overhear a conversation concerning the missing official. After the conversation you will spend 3000 zeny (if you have it) and obtain 4 Assorted Seafood. 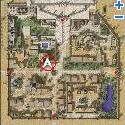 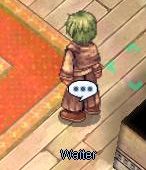 6. Proceed to Veins and in a building on the left end of the city talk to the Magistrate by the name of Al Hamad. Ask him if he's in trouble. When he gives you the brushoff, talk to the guard in the room and then come back and question him further. He will tell you that you need a written order from a high ranking official in order to divulge information. 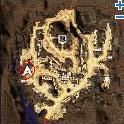 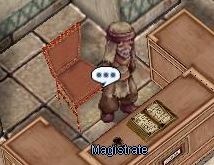 7. Go to High Priest Zhed in the Rachel Monestary Cheshrumnir. Note that you must have completed the Veins Supply Base quest in order to complete this part.   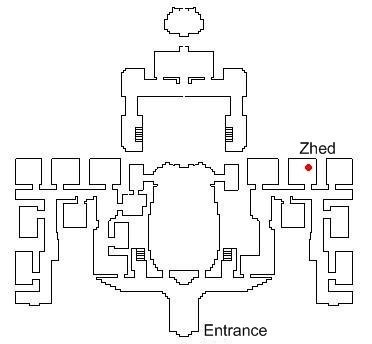 8. Outside of the monestary, you'll need to talk to the High Priest Niren, and inquire about the smugglers. She will send you back to the Magistrate.  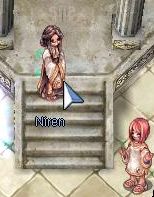 9. Return to the Magistrate. He will provide you with some more information regarding the smugglers. 10. Go to the Veins tavern and speak to the Drunkard. 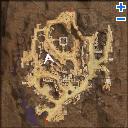 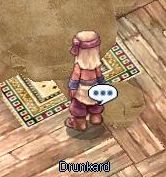 11. Go talk to the Kid Karyn, that you helped durring the Sibblings Quest. He'll tell you about a boat that you can use. 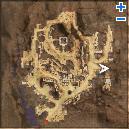  12. South of Veins you'll find a boat. When you investigate it, you'll be greeted by Larjes. Talk to Larjes or use the boat to go to the Nameless island. 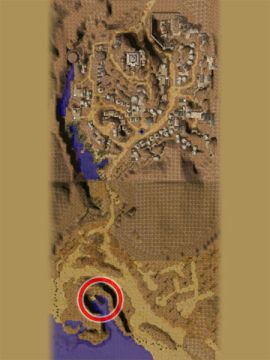 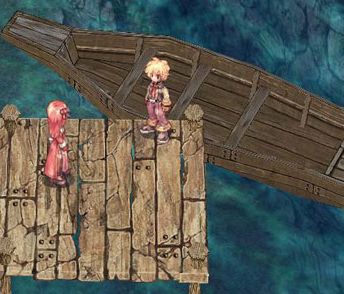 13. You'll need to investigate the island. There are triggers just west of the docks and inside a house near the top center, but these are not required. To continue, click on the Dead Crow and investigate it.   14. Once you wake up, you'll find yourself inside a house with Larjes. When you attempt to leave the house, you'll be attacked by a Zombie Slaughter. The monster must be killed before the house can be left. There is no death penalty if you die at this encounter. After you leave the house, you will be able to freely enter and leave nameless island night map. Warning: Once you leave the house, you will be on the Nameless Island (Night) map, where there are numerous agressive monsters. You will lose experience if you die after this step. 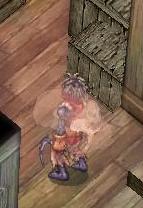 15. Following up with your investigation, you will have to make your way to floor 2 of the monestary and investigate the Books on a desk in Hibram's quarters. Warning: The MVP boss monster Fallen Bishop spawns within this room, so be careful when performing this step. Tip: It is possible to read the book from a ledge to the left side of the room, so you don't have to directly enter the room if you don't have to. 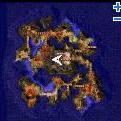 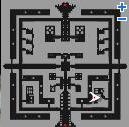 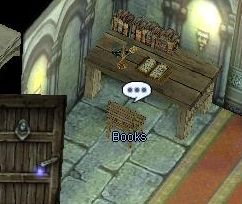 16. Continue to floor 3 of the monestary. In the top right most corner of the map in a prison cell you will find a Man colapsed on the ground. When you investigate the body, you will be attacked by the Dead King. This battle is fairly easy, if you can kill the regular monsters in the monestary you should be able to kill him. Once killed, you can retreive the Token of King from the body. Warning: While this quest battle is not hard, the area in which the battle occurs in has a high spawn of Necromancers, and can be very difficult to complete without assistance.  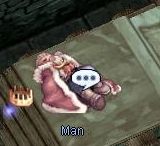 17. Return to Larjes at the docks of the nameless island and give him the Token of King. You will be rewarded 1,000,000 experience. 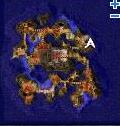  18. Visit Father Bamph and report your findings with him. 19. Return to Nerin You will be rewarded 500,000 experience. Peace to the Arunafeltz
 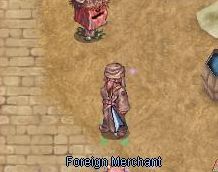 2. The Traveling Vendor appears near the center of morroc. He's not always there however, so in order to get him to appear you'll have to walk around the center fountain until he shows up. You may need to do this several times before he shows up. 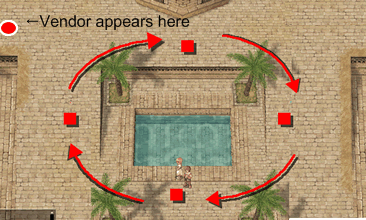   3. Return to the Foreign Merchant, and give him the drink from the vendor. He'll tell you that he's there to deliver a message from High Priest Zhed. 4. Talk to High Priest Zhed, and agree to the task he proposes. He'll send you looking for Niren within the temple. 5. Find the Female Follower on the left side of the temple. She'll direct you to Niren who is outside in the temple garden.  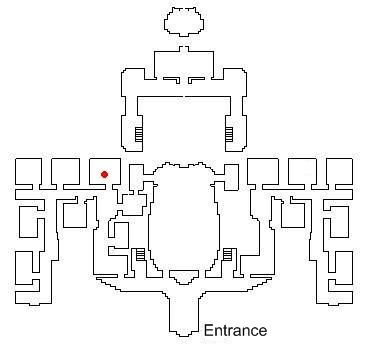 6. In the Cheshrumnir Guarden on the right side you'll find Niren and her follower. Talk to her and refer to Zhed. She won't be impressed though, and send you back.   7. Return to High Priest Zhed and tell him her response. He'll write a letter and ask you to take it back to Niren. 8.Bring the letter back to Niren. She'll read the letter and ask for some time to think about her answer. This may take a while, keep checking with her until she agrees to help you. She'll ask you to aproach the Pope. 9. Enter the Pope's office through the left side of the Temple and talk to the Pope. She'll ask you questions like before. When given the chance, ask her if she's lonely.  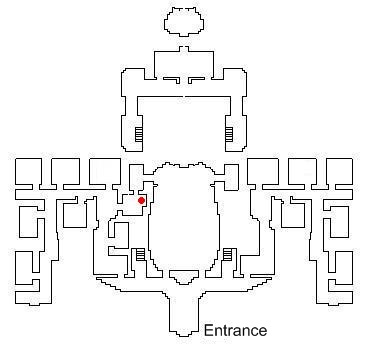 10. Return to Niren and tell her about your visit. She'll ask that you meet Ishmael in a small settlement north or rachel. 11.You'll find Ishmael in the Adumbla Grasslands, on the map Rachel Field 3. When you talk to her, she will ask that you bring her a Sardonyx. Once you bring the Sardonyx, she'll do the work you've brought for her. Warning: This map is very crowded with monsters and also contains the MVP boss Atroce. Take caution when traveling to this npc. 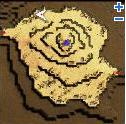  12.Bring the documents you received from Ishmael back to Niren. She'll ask you to talk to High Priest Zhed. 13. Visit High Priest Zhed. He'll tell you the preparations are complete, and ask you to meet him at the pope's office. 14. Enter the Pope's Office and talk to the Pope. Once done, you'll be returned to Rachel where you'll be treated to an address from the Pope to her people. 15. Return to Niren. She will thank you for your work, and you will receive 1,000,000 experience. 16. Return to High Priest Zhed. He will also thank you, and you will receive 1,500,000 experience. Z-Gang Quest
Quest begins at the "Bulletin Board" in front of Prontera Castle. Quest details are currently unknown. Rogue Guild Investigation Assistance
Quest begins at an NPC on the bench east of the Prontera water fountain "Traveler". Quest details are currently unknown. Muff's Debt
Quest begins a little north-east of the Comodo Kafra at the NPC "Maf". Quest details are currently unknown. Broken Diamond
Quest begins at south-west Morroc at the NPC "Abraham". Quest details are currently unknown. Unlucky Emerald
Quest begins at south Morroc at the NPC "Poor Man". Quest details are currently unknown. |
 |
||||||||||||||||||||||||||||||||||||||||||||||||||||||||||||||||||||||||